Talk About Creamy And Rich!!!
Happy July 4th week. We had such a special day. We got to spend it with the oldest daughter, her husband and their little girl – yep – that grandbaby again!! We ate and talked and ate and watched old home movies and ate and shot off fireworks (since we live way out in the country) and then stopped eating. The grill got fired up for bratwurst, hot dogs and luscious hamburgers infused with olive oil, liquid smoke, garlic powder, salt and worchestershire sauce. Dinner was good. But dessert was better!
Now, I have to interject here that I have never – and I seriously mean never – made a decent batch of homemade ice cream. In fact, I can truthfully say that I’ve never EATEN a decent batch of homemade ice cream. I grew up on the stuff and, I suppose I need to apologize to family, but I always hated it. Just hasn’t ever been my cup of tea – well – bowl of ice cream. It was always so fragile that it turned into soupy stuff too fast, was grainy with ice crystals and was just too, too sweet. Putting chocolate syrup on top of that made it sickly sweet. And then, when leftovers were frozen, the result was a brick the shape of the container that no jackhammer could chip! Just a big waste of ice, salt and electricity to me!
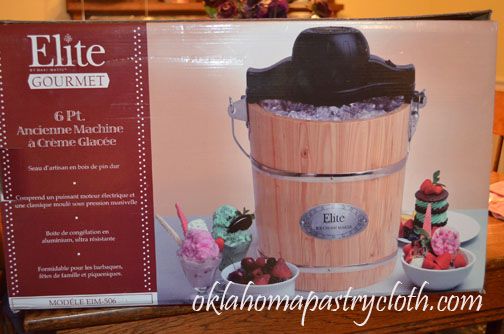
Last Father’s Day, we got Mr. Fix-It a fancy, schmancy wooden ice cream freezer that can either be used with a hand crank, or made so much easier with an electric crank. Sadly, the gift had never left its box and so on the 4th, Mr. Fix-It announced that he wanted homemade peach ice cream, made with peaches from our trees. I was bound and determined to find a recipe that would knock his socks off. AllRecipes.com came to my rescue!!
In order to make this recipe, you have to plan ahead because the base needs to chill in the frig overnight. That is very important. I made the base at about 9 in the evening on July 3rd, poured it into a bowl and allowed it to cool for 20 minutes, putting it in the refrigerator to cool thoroughly all night and even about half of the next day. When we poured the custard mixture into the hopper of the ice cream freezer, Mr. Fix-It was a little nervous at the amount. It looked like there was very little in the barrel. However, as it churned, that amount doubled and then tripled and believe me, we had plenty of ice cream!
When the ice cream freezer stopped, we packed the canister in ice for two hours before serving. I was amazed at the result. It was the creamiest, most solid, not too sweet confection I’ve ever tasted. I was ecstatic. My daughter and son-in-law had two helpings each and oohed and ahhed over its creamy texture. However, Mr. Fix-It was not a happy camper. I had not made the fragile, soupy, ice crystal laden, ice milk with which we had all grown up. He was so disappointed. He was visably disappointed. But tasting that creamy peachiness, I just couldn’t feel bad. I was so excited over my results that I just couldn’t feel bad. However, I guess that next time, I’m will get two machines going: one with junket-style, old-fashioned, ice milk style stuff and the other with this new recipe!! I can tell you ahead of time which one will disappear first! Mr. Fix-It will be happy to have one ice cream freezer all to himself! So, try this out on your next hot weekend and let me know what you think. Thanks, AllRecipes.com!!
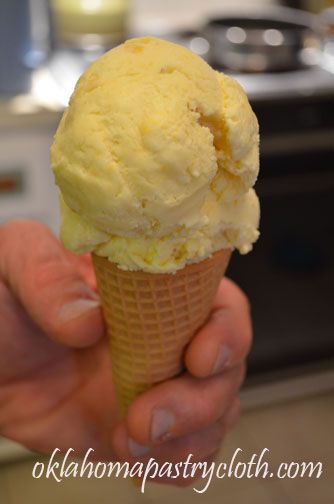
Have you EVER seen homemade ice cream actually make round scoops onto an ice cream cone? Well, THIS one does! And notice that Mr. Fix-It IS getting ready to eat this in spite of his misgivings!
Creamy Ice Cream Base
1 cup heavy cream
3 cups half-and-half cream
8 egg yolks
1 cup white sugar
1/8 teaspoon salt
1 tbsp vanilla (I added 2 tsps Mexican vanilla because it is so strong)
Optional: 1 cup pureed fruit like peaches, apricots, strawberries, raspberries, bananas, etc.
or 1/2 cup cocoa can be added to the egg mixture in the second step for
flavored ice cream.
Instructions:
1. Pour the heavy cream and half-and-half cream into a heavy saucepan, place over medium-low heat, and heat until barely simmering, stirring frequently. Turn the heat down to low.
2. In the meantime, whisk together the egg yolks, sugar, and salt in a large bowl until thoroughly combined. (Make any additions here)
3. Slowly pour about 1/2 cup of hot cream mixture into the egg yolk mixture, whisking constantly. Repeat three times more, for a total of 2 cups cream added, whisking thoroughly before adding each additional 1/2 cup of hot cream to the egg yolk mixture. Pour the egg yolk mixture back into the saucepan with the remaining hot cream, and whisk constantly over medium-low heat until the mixture thickens and will coat the back of a spoon, 5 to 8 minutes. Do not let mixture boil.
4. Pour the ice cream base into a bowl and allow to cool for about 20 minutes; place in refrigerator and chill overnight. The next day, pour into an ice cream maker, and freeze according to the manufacturer’s directions. Remove the ice cream, pack into a covered container, and freeze for 2 hours or overnight before serving. At this point, I removed the paddle and packed the canister in ice instead of removing the ice cream to another container. I only put the leftovers into a plastic container to store in the freezer.
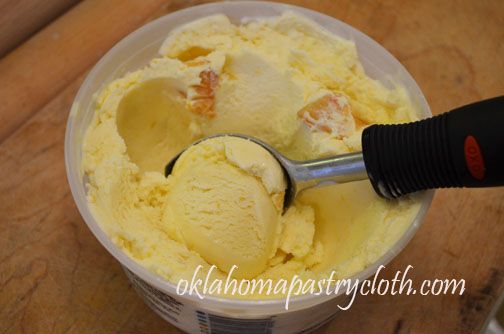
Even after freezing overnight and the next day, it is still just as creamy as can be.
Happy Ice Cream Creating!
MB
Oklahoma Pastry Cloth™ Company on Facebook
THUMBTACK.COM


